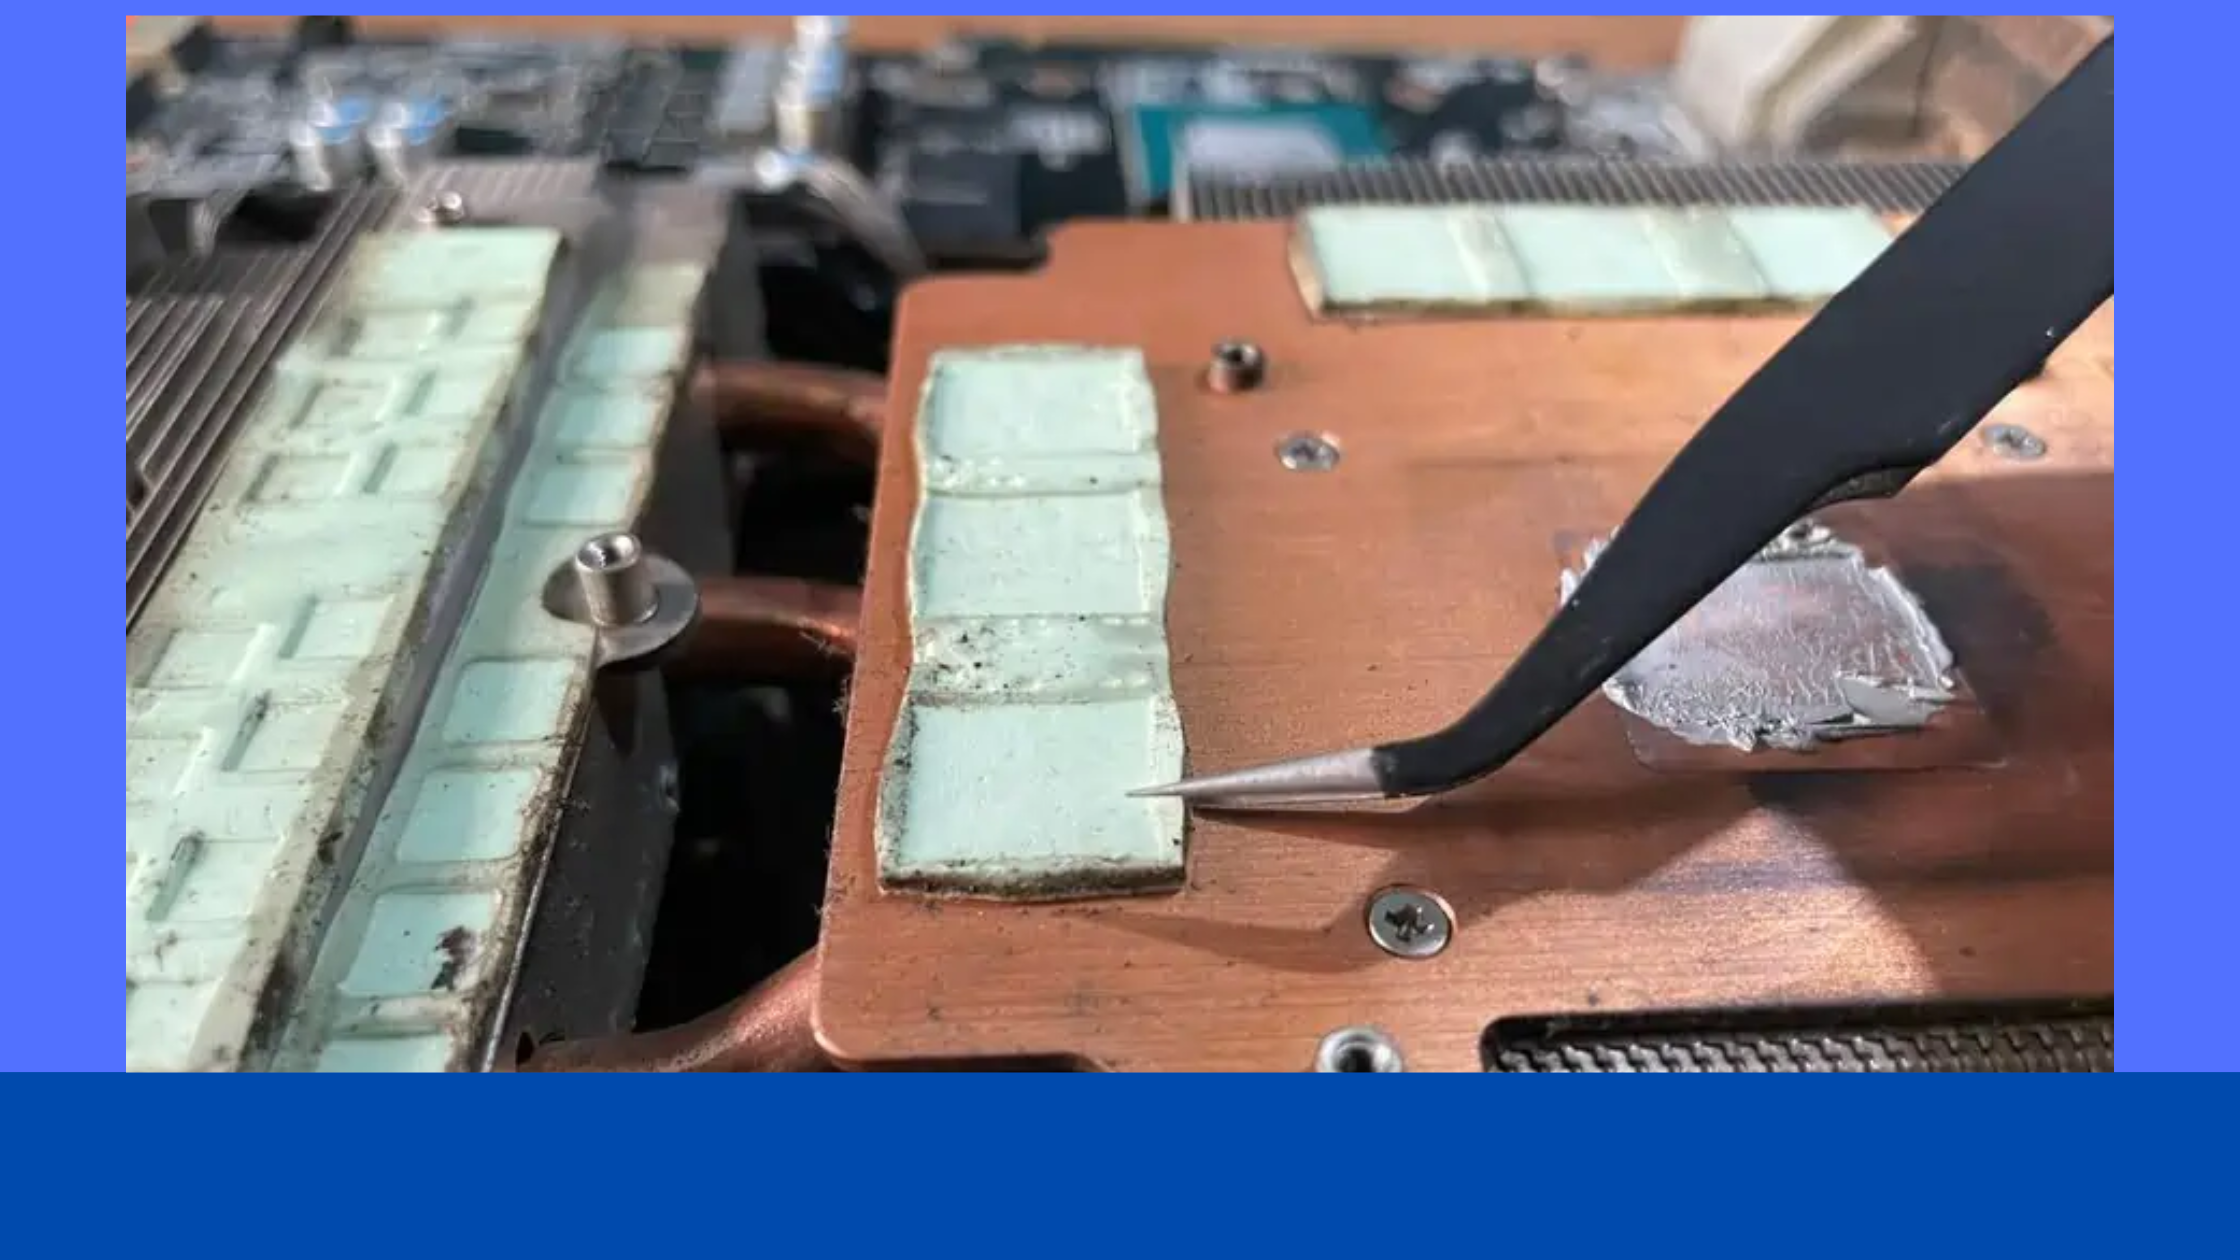
Replace thermal pads on any GPU is very easy. In this article, I will teach you how to do this. Graphic cards can be very tasty when pushed hard in games and professional workflows.
Thermal interface materials such as pastes and pads are essential for their operation. However, dirt and grime build up inside GPUs that operate in poor conditions, which reduces the thermal pads and, over time, affects their ability to conduct heat from important components such as the GPU die, VRAM, or power circuitry.
This degradation reduces performance, causes crashes, and even causes component failure if not checked.
Sometimes, factory-installed thermal pads can also be of poor quality, especially in budget cards, offering poor conductivity and preventing increased power transmission and memory clocks, leading to reduced efficiency.
Do I Need to replace the thermal pad On The GPU?
Changing the thermal pad depends on how you use your graphics card. This section will look at different usage issues and determine if they need to be replaced, for example in:
- Gaming
- Render or Mining Farms GPU
1. Gaming GPU
Games can be quite demanding on a GPU but only run for hours at a time. Gaming PCs have the same GPU and enough airflow for the most part.
However, if you purchased a used GPU, if your GPU performance doesn’t match the benchmarks and shows, replacing old pads with new ones may improve high-temps benchmarks.
2. Render or Mining Farms GPU
Changing the thermal pads from time to time is good, especially if you don’t have strong protection against dust and dirt.
Replacing older pads can increase the age of GPUs and reduce downtime by reducing the chances of failure.
Even with a cleaner environment, replacing factory thermal pads from critical to high quality like these can reduce memory speeds and improve longevity and performance.
Regular cleaning of GPU PCBs, adding fresh thermal paste, and replacing faulty fans can also have a big impact and should be done as usual.
How can you replace the thermal pads on your GPU
Replacing thermal pads on your GPU involves:
- Separating the heat sink from the PCB.
- Peeling off old pads and measuring thickness.
- Replacing them with fresh pads.
- Reassembling your GPU.
- You can also replace dry thermal paste and damaged fans during this process. In this guide, we will only cover thermal pad replacement.
- Ensure you have the necessary tools
- Unscrew the heatsink from the PCB
- Organize your screws
- Locate any possible obstructions, such as fans or RGB headers.
- Separate the heatsink from the PCB
- Clean the GPU PCB
- Remove the old heatsink thermal pads.
- Cut out new thermal pads.
- Apply the new thermal pads
- Reassemble your GPU
1. Stress-test and benchmark your GPU
With apps like FurMark, you may define a baseline for your GPU’s temps. Use GPU-Z or HWinfo to keep track of all the temps. Run benchmarks like Unigine’s Heaven.
2. The right thermal pad for your GPU
The thickness of the thermal pad may be adjusted by 0.5mm. Heat transmission is reduced when the thermal pad is smaller, resulting in greater temperatures.
A thicker pad might damage the PCB of the GPU. Thermal pad. EU, for example, provides a comprehensive database on thermal pad thickness for a wide range of cards.
You’ll need a set of calipers to order various sizes and measure the thickness of your original pad.
3. Ensure you have the necessary tools
If you want to change thermal pads properly, you need the correct equipment. iFixit’s Mako screwdriver set, for example, can work with various screws used by major GPU manufacturers.
In addition, the lid is molded with a template for a parts tray for ease of use. To remove fan connections and peel off old thermal pads, a pair of precision tweezers will come in helpful.
You may verify the thickness of the original pad with a caliper if you don’t have access to one. ensuring that you have all the essential equipment
4. Unscrew the heatsink from the PCB
To avoid static discharge:
- Ensure your work area and hands are clear of dust and moisture and grounded (don’t work on a carpet).
- Locate and remove the screws around the GPU die (indicated in the picture). Because certain graphics cards, such as the RTX 30 series Founder’s Edition from Nvidia, use a different way of removing the heatsink, we suggest finding a guide online that explains how to complete this task correctly in your particular case.
- Unscrew the heatsink.
5. Organize your screws
Use a parts tray or organizer to keep track of where each screw goes after you’re through working. Make sure you utilize the one that comes with your screwdriver set. Sort your screwdrivers.
6. Recognize fan or RGB headers that may come in the way.
Multiple RGB or fan headers may exist on your GPU, and some of these connections may prohibit the GPU from being separated.
Connect the wires from the side to make it easier to remove them. Take out the fan headers.

7. Separate the heatsink from the PCB
For simple separation, it may be necessary to slowly spin the heatsink and PCB in different directions to remove the GPU.
The PCB should softly fall off if you do it correctly. This step carries a high risk of damaging the PCB, so proceed cautiously.
Photograph your GPU’s PCB and heatsink to learn the location of each pad. Removing the heatsink from the radiator
8. Measure heat pad thickness
If you can’t find any information online, use an electronic caliper to measure pad thickness. To get an accurate reading, slip the thermal pad through the caliper arms as little as possible using tweezers. Do this for every one of your thermal pads.
Make careful you label each thermal pad’s thickness in the photo you previously took. You should measure the thickness of the thermal pad.
9. Clean the GPU PCB
Blow away any dust or filth off your PCB using a can of compressed air. You should remove thermal pads on the PCB’s GPU memory or MOSFETS. To thoroughly clean these parts, use a q-tip soaked in 99 percent isopropyl alcohol.
Alternatively, you may replace any old thermal paste with some new. This phase does not need the use of any metallic instruments. GPU PCB that has been thoroughly cleaned
10. Remove the old heatsink thermal pads.
Carefully remove the old thermal pads from the heatsink with tweezers so as not to harm them. To remove any remaining oil or residue from the pads, dab a kitchen towel in isopropyl alcohol.
Remove the old thermal paste if you intend to replace it with a newer one. Discarding the old heat pads isn’t necessary just yet. You should remove heat pads from the heatsink.
11. Cut out new thermal pads.
If the thermal pads on your GPU are too thin, you can make replacements by measuring the present pads’ length and breadth.
Even if the old pads are destroyed, the heatsink has marks that can help. Get rid of the heating pads.
12. Apply the new thermal pads
You can use tweezers to apply the new thermal pads. After you’ve removed the heatsink, take a photo of the area to help you choose where to place new thermal pads.
If the pads don’t stick, use a blunt object to press down on them gently. it would help if you used fresh thermal pads
13. Reassemble your GPU
Finally, you may shut down your graphics card after installing new thermal pads. Reconnect the andy fan or RGB connections previously disconnected by bringing the two sides to close together.
Press firmly with the fans facing down to align the screw holes of the heatsink and PCB.
Final Thought
replace thermal pads on any GPU isn’t necessary unless you’re experiencing very high memory temps or frequent system crashes.
To make matters worse, replacing these pads with new ones of the wrong size and thickness might make things worse. As a result, users who use GPUs in dusty conditions need to repair their thermal pads regularly.

