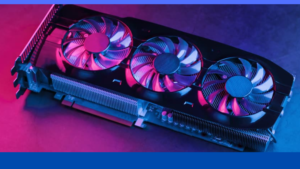
So you’ve been using integrated graphics for a long and have only recently gained a new graphics processing unit (GPU).
To assist you and a fellow player, we’ve put up this guide to make things as simple as possible for you. In this topic We show you basics things you need to do before and after the upgrade your graphics card safely.
Steps to take after upgrading a GPU Include:
- Putting Humpty Dumpty back together again
- Reconnect all the cables
- Start your PC
- Download & Install the latest drivers
1. Putting Humpty Dumpty back together again
After replacing your graphics card, it’s time to put your computer back together. However, you may want to close the side panel the first time you start.
It will let you see if your new graphics card fans rotate when you start the PC.
2. Reconnect all the cables
Plug in all the cables you have re-plugged in step 2 and put the power switch on your power supply back to me.
Ensure all your peripherals are plugged in correctly, or your system may not work properly. It means your power cable, monitor, mouse, keyboard, Ethernet (LAN), or other devices you have.
3. Start your PC
When you are sure, everything is set up correctly, press the power button and take a closer look at what happens.
If your monitor displays the information normally when you start your computer, this is a good sign! Let it start in Windows before the next step.
If your PC doesn’t start or your monitor doesn’t show anything after the PC starts, double-check that all cables are plugged in correctly (6- or 8-pin power on your graphics card).
Don’t forget the connectors!) And your monitor is on. If that doesn’t work, turn off the PC by pressing and holding the power button.
4. Download & Install the latest drivers
If everything goes according to plan, your computer should start, and you will look at your desktop.
Before you start your favorite game to see how well your new graphics card performs, you must first download the latest graphics card driver from AMD or NVIDIA, depending on your graphics card. After selecting and installing the latest drivers for your graphics card, you should be good to go!
Steps to take before upgrading a GPU Include:
- Plug out, Plugin
- Toolbox
- Uninstalling old VGA drivers
- Power off your PC
- Dusting – While you’re in there
- Unscrew slots
- Unplug power connectors

1. Plug out, Plugin
Once the old card is plugged in and is no longer secure in the case with the patch, you can gently push or pull the catch at the end of the PCI-e slot that holds the graphics card.
It would help if you now managed to remove the old graphics card from the case and replace it with a new one.
Once the new graphics card is inserted into the PCI-e slot, make sure you secure it in the case using the patch removed from your old graphics card.
Be sure to connect the power connectors to the top of your new graphics card; they should be 6- or 8-pin connectors from the power supply.
2. Toolbox
Although the PC is a digital computer, to change any component, you need to ‘go under the hood’ and physically change something.
We recommend having a set of Philips screwdrivers off to upgrade your graphics card.
3. Uninstalling old VGA drivers
Before you can proceed and physically replace the graphics card, you must uninstall your old graphics card drivers.
Check if your old graphics card is based on AMD / ATI or NVIDIA, then uninstall the old drivers.
4. Power off your PC, and unplug all the cables.
Remove all cards from the casing after successfully uninstalling your previous drivers and turning off your PC.
On the back of most power supplies, there is a manual I/O switch; ensure it is set to O. To complete the process, unhook the power supply unit’s cord from the rear of the power source.
5. Dusting – While you’re in there
Using the PC for months or years can get a lot of dust inside. Dust can affect the performance of your computer and cause all kinds of problems, so it is best to clean it carefully using a vacuum cleaner to suck up most of the dust.
6. Unscrew slots
To secure a graphics card, you often need to screw it into the motherboard’s PCI-e slot and the rear of the chassis.
After the case’s side cover has been removed, you should be able to see the screw clearly and access it.
You will protect it with one or two patches depending on the graphics card’s size. While doing so, be cautious not to strike any of the components!
7. Unplug power connectors
Graphics cards require more power as they get better. The power port on the top of many modern graphics cards is a 6- or 8-pin connector.
Before continuing, ensure all cords from your previous card are properly plugged in.
Final Thought
It’s as simple as uninstalling your old card’s driver and plugging in a new one. If your old card is still installed, get a new plug or any power Wire up the connector, install the driver of this card, connect your monitor, and enjoy.
After replacing your graphics card, it’s time to put your computer back together. However, you may want to close the side panel the first time you start. It will allow you to see if your new graphics card fans rotate when you start the PC.

